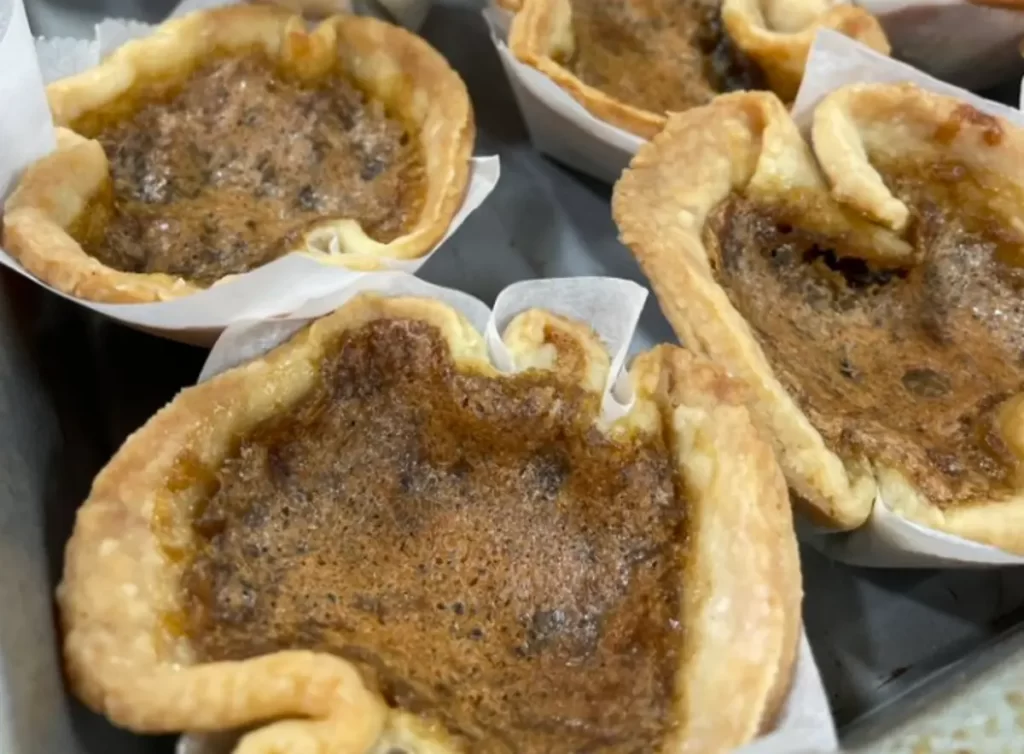
Butter tarts are my sweet, yummy favorite! They’re easy to make and give you a soft, sweet bite that just melts away. In less than an hour, you can enjoy these little joys, making them a quick and tasty treat anytime.
If you liked making the caramel brownies or the pumpkin pie bars with me, you’re going to love these butter tarts too. They’re a classic sweet treat that always makes me happy, and I bet they’ll make you happy too!
Come along, and let’s make these tasty butter tarts together. Whether you bake all the time or this is your first try, I’m so excited to share this easy and yummy recipe with you!
Table of Content
Serving Size and Preparation Time:
Serving Size and Yield:
This butter tart recipe yields 12 scrumptious tarts, perfect for sharing with friends and family. However, you can make half or double the recipe easily if you want fewer or more tarts.
Time to Make the Butter Tarts:
| Task | Time Needed |
|---|---|
| Prep Time | 15 minutes |
| Baking | 12-15 minutes |
| Cooling Down | 10 minutes |
| Total Time | 37-40 minutes |
Quick Tips:
If you’re short on time, using a ready-made pie crust from the store is a good shortcut. It’s quick and still tasty!
Ingredients You’ll need for Butter Tarts Recipe:
For the Pastry Crust:
- 1/2 cup (113g) unsalted butter, cold and cut into pieces
- 1 1/2 cups (187g) all-purpose flour
- 1/4 cup (50g) granulated sugar
- 1/4 teaspoon salt
- 1 large egg
- 1 tablespoon (15ml) water
For the Butter Tart Filling:
- 1/2 cup (125ml) corn syrup
- 1/2 cup (100g) brown sugar, packed
- 1/3 cup (76g) unsalted butter, melted
- 1 egg
- 1 teaspoon vanilla extract
- 1/2 teaspoon white vinegar
- 1/2 cup (60g) raisins or chopped pecans (optional)
Pro Tip for the Best Butter Tarts:
- Ensure your butter for the pastry is cold to achieve a flaky, tender crust.
- Using room temperature egg for the filling ensures a smooth mixture without risk of curdling.
- If you choose to use raisins or pecans, consider toasting the nuts or soaking the raisins in warm water for a few minutes for an extra flavor boost!
Notes:
- Raisins or pecans are optional and can be omitted or substituted according to your preference.
- While any brand of ingredients will work, a high-quality vanilla extract can elevate the flavor of your butter tarts.
Essential Kitchen Tools for Butter Tarts:
Baking these delightful butter tarts doesn’t require a ton of fancy equipment. Here’s a simple list of kitchen tools you’ll need to make these sweet treats. Each item is common in most kitchens, ensuring you can get started without a hitch!
- Mixing bowls
- Measuring cups and spoons
- A rolling pin
- A tart pan or muffin tin
- A whisk or fork
- A saucepan (for melting butter)
- A cooling rack
- A pastry cutter or knife
- A cutting board
How to Make Butter Tarts:
1. Prepare the Pastry Dough:
- In a large mixing bowl, combine 1 1/2 cups of all-purpose flour, 1/4 cup of granulated sugar, and 1/4 teaspoon of salt.
- Add 1/2 cup of cold, unsalted butter, cut into pieces. Use a pastry cutter or a knife to work the butter into the flour mixture until it looks like coarse crumbs.
- In a small bowl, whisk together 1 large egg and 1 tablespoon of water. Add this to your flour mixture, stirring until everything is well combined.
- Shape the dough into a disc and let it chill in the refrigerator for at least 30 minutes.
2. Shape the Tart Shells:
- Preheat your oven to 375°F (190°C).
- Roll out the chilled pastry dough on a lightly floured surface to about 1/8 inch in thickness.
- Use a round cutter to cut out circles and gently press them into a tart pan or muffin tin, ensuring they are well-shaped to the sides.
3. Mix the Filling:
- In a medium mixing bowl, whisk together 1/2 cup of corn syrup, 1/2 cup of packed brown sugar, 1/3 cup of melted unsalted butter, 1 egg, 1 teaspoon of vanilla extract, and 1/2 teaspoon of white vinegar until the mixture is smooth.
- If you’re using 1/2 cup of raisins or chopped pecans, stir them into the mixture at this point.
4. Fill and Bake the Tarts:
- Distribute the filling evenly among the prepared tart shells, ensuring not to overfill them.
- Bake in your preheated oven for 15-20 minutes, until the pastry turns golden and the filling is slightly bubbly and set.
- Allow the tarts to cool in the pan for about 10 minutes, then transfer them to a cooling rack to cool completely.
5. Serve and Enjoy:
- Once the tarts are completely cooled, enjoy them as is, or store them in an airtight container for later.
Solving Your Butter Tart Baking Mysteries and More!
Frequently Asked Questions About Butter Tart Recipe:
Yes! You can use maple syrup or golden syrup instead of corn syrup. But remember, it might change the taste a little bit.
No problem! You can leave them out. Your butter tarts will still be sweet and yummy without them.
Yes, you can! Store-bought pastry dough works well and saves time. But i personally prefer homemade pastry dough.
Put your leftover tarts in a container that seals tight. You can leave them out at room temperature for up to 3 days, or put them in the fridge to keep them fresh for up to a week.
Absolutely! Put the tarts in a container, pop the lid on, and place them in the freezer. When you want to eat them, just take them out and let them warm up at room temperature.
Solving Common Butter Tarts Issues:
My dough is too sticky. What do I do?
Add a little more flour, one tablespoon at a time, until it’s not sticky anymore.
The filling is spilling out while baking.
Make sure not to put too much filling in the tart shells. It should not go over the edges of the pastry to avoid spills.
My pastry is hard, not flaky.
Make sure your butter is really cold when you mix the dough, and try not to mix it too much. Too much mixing can make the pastry hard.
The filling isn’t setting. It’s too runny.
Make sure you measure all the ingredients for the filling correctly. Also, let the tarts cool down completely. The filling will get firmer as it cools.
The bottom of my tarts isn’t cooked enough.
Make sure your oven is hot enough before you put the tarts in. You might also want to place them lower in the oven so the bottoms cook properly without the tops getting too brown.
Other Delicious Recipes You May Also Enjoy!!
- Strawberry Bread Recipe with Fresh Strawberry Glaze
- Frozen Hot Chocolate Recipe
- Lemon Blueberry Pancakes
- Cherry Bars
- Pasta Alfredo Con Pollo
- Italian Bruschetta Recipe: A Guide to Homemade Bruschetta
Made the tarts? We’d love to hear from you! Drop a comment below, share your tweaks, and let’s spread the baking joy together. Your tips might just be the secret ingredient someone needs!