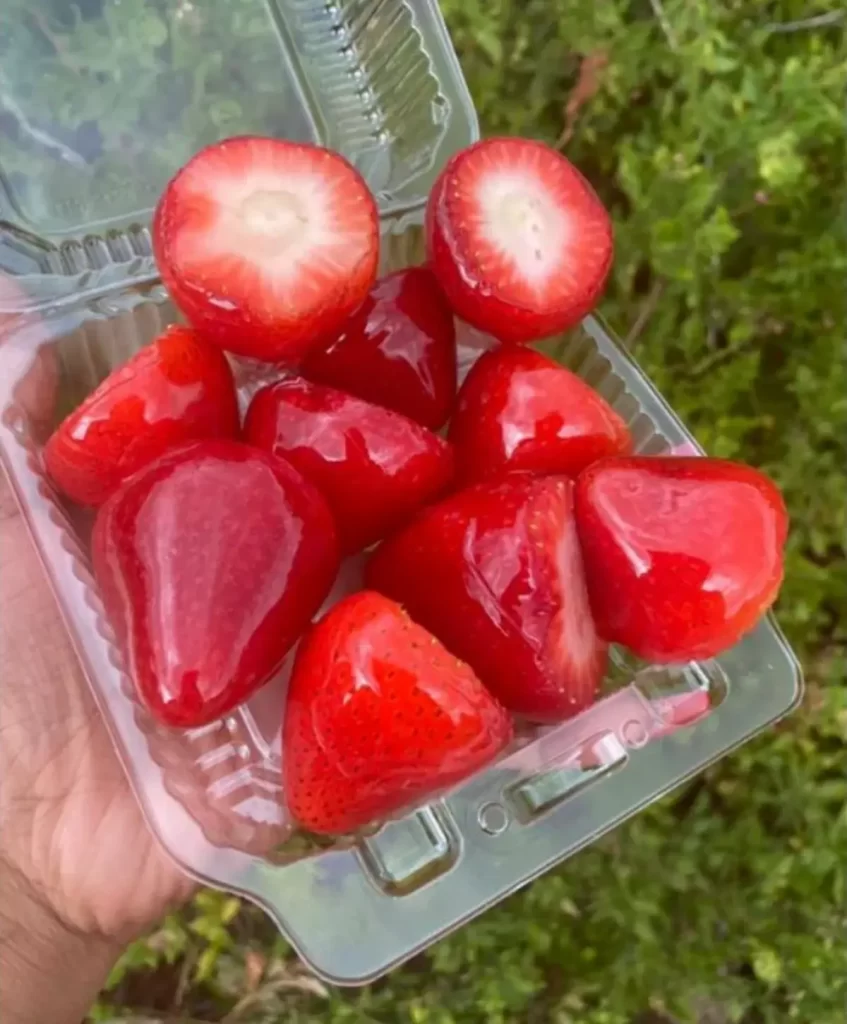
Candied Strawberries are so fun and tasty! I always enjoy the sweet crunch followed by a burst of juicy strawberry. It’s just strawberries and a sweet sugar mix, but it tastes like a special treat.
While I adore these on their own, sometimes I like to pair them with other sweet treats. For instance, having them alongside a Strawberry Cream Cheese Danish or after enjoying some Cherry Blossom Cookies with Hershey Kisses just enhances the sweet experience.
Ingredients:
Ready to make some sweet Candied Strawberries? Let’s check we have everything we need first. Having all our ingredients ready makes cooking fun and easy. So, here’s our simple list to get started:
- Fresh Strawberries
- 2 cups Granulated Sugar
- ½ cup Water
- ⅓ cup Corn Syrup (optional, but I like using it because it helps prevent the sugar from crystallizing)
- Toothpicks or Skewers (also optional, but they make dipping the strawberries into the syrup so much easier)
- Parchment Paper or Silicone Baking Mat
- Candy or Food Thermometer (optional)
How to Make Candied Strawberries:
1. Prepare the Strawberries:
- Wash the strawberries thoroughly and ensure they are completely dry to allow the sugar syrup to adhere properly.
- Insert toothpicks or skewers into the stem end of each strawberry, ensuring a firm grip for dipping into the syrup.
2. Creating the Sugar Syrup:
- In a medium saucepan, combine the water, sugar, and optional corn syrup.
- Stir the mixture to combine the ingredients and then place it over medium-high heat.
- Allow the mixture to boil, then reduce the heat to medium, letting it simmer until the sugar syrup reaches a temperature of 300-310 degrees F (149-155 degrees C), turning a golden yellow color. Ensure not to stir during this process to prevent crystallization.
3. Dipping and Coating the Strawberries:
- Once the sugar syrup reaches the desired temperature and color, begin dipping the strawberries.
- Holding onto the toothpick or skewer, immerse each strawberry into the syrup, ensuring an even coating.
- Gently shake to remove any excess syrup and place them on parchment paper or a silicone baking mat to cool and harden.
4. Serve and Enjoy Your Candied Strawberries:
- Allow the strawberries to fully cool, permitting the candy coating to harden, which should take a few minutes.
- Serve and enjoy the strawberries immediately after the coating has set to experience the delightful combination of crisp candy and fresh, juicy strawberries.
FAQs and Common Issues for Candied Strawberries:
They’re best enjoyed right after making. After an hour or so, they start to release juice and the candy shell softens.
Fresh strawberries work best. Frozen ones might release more water, making the candy coating tricky.
Not really, but I like adding it. It helps the sugar not to turn grainy and gives a smoother finish.
Absolutely! You can mix in candy flavors or extracts. Just add them to the syrup before you dip the strawberries.
No worries! Try the cold water test. Drop some syrup into cold water. If it becomes hard instantly, it’s good to go.
Stirring the sugar while it’s boiling can do that. Using corn syrup or making sure no sugar sticks to the pan’s sides can help.
Yes, it’s because of the sugar syrup’s heat. That’s why eating them soon after making is best.
Other Delicious Recipes You May Also Enjoy!!
- Cherry Blossom Cookies with Hershey Kisses
- Butter Tarts Recipe: A Canadian Classic
- AMAZING Strawberry Cheesecake Bars
- Cream Cheese Banana Bread
Have you liked our candied strawberries recipe? We’d love to hear from you! Drop a comment below, share your tweaks, and SHARE the recipe with your friends!


