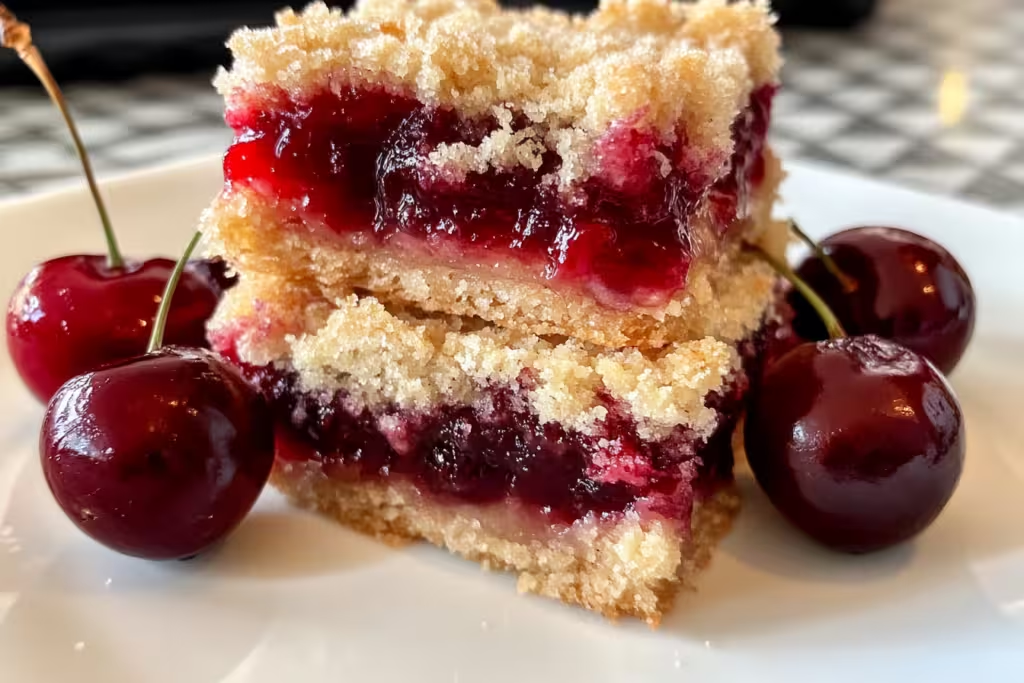
Oh my goodness, let me tell you about my latest kitchen obsession – Juicy Homemade Cherry Crumb Bars! These little treats are not just your ordinary dessert; they are like a warm hug on a plate! I’ll never forget the first time I made these; it was during a cozy summer get-together with friends. I casually threw them together, and by the end of the night, there wasn’t a crumb left! Watching everyone savor each bite while making happy sounds was the best reward. Not to mention, the smell wafting through the house was simply divine!
There’s something so lovely about the tart, juicy cherries mingling with that buttery, crumbly topping. If you’re looking for an easy dessert that screams summer and will impress your guests (or just yourself, let’s be real!), then these bars are calling your name! Let’s dive into the details so you can make these tasty treats in your own kitchen!
What’s in Juicy Homemade Cherry Crumb Bars?
All-purpose flour: The backbone of our crust! I use all-purpose because it creates a nice, sturdy base without being too heavy.
Old-fashioned oats: These add a lovely texture to the crumb topping and a hint of nutty flavor. You can’t go wrong with oats in desserts!
Granulated sugar and brown sugar: The combo of sugars gives the crust and topping a delightful sweetness with a slight caramel flavor from the brown sugar.
Baking powder: Just a teaspoon of this helps our bars rise slightly, making them nice and fluffy.
Salt: A pinch of salt enhances all the sweet flavors – it’s like magic!
Unsalted butter: Melted butter creates that rich, melt-in-your-mouth experience. It’s essential for the crust and crumb topping.
Vanilla extract: A splash of vanilla, because every dessert deserves a touch of warmth and personality!
Fresh or frozen cherries: The star of the show! If you use fresh cherries, make sure to pit them. Frozen works wonderfully too, especially out of season.
Cornstarch: This thickens the cherry filling beautifully, ensuring it doesn’t run everywhere when you cut into your bars.
Lemon juice: Just a little acidity helps balance the sweetness of the cherries, making the flavor pop!
Almond extract: Optional but oh-so-recommended! It adds a lovely nutty flavor that complements the cherries perfectly.
Extra granulated sugar: Just a sprinkle on top for that stately, sparkling finish!
Is Juicy Homemade Cherry Crumb Bars Good for You?
Now, let’s chat health benefits, shall we? While these cherry crumb bars are an indulgent treat, they do come with some positives!
Cherries: Packed with antioxidants, vitamin C, and anti-inflammatory properties, they’re basically a mini superfood! The tart variety is especially known for its health benefits.
Oats: These heart-healthy gems are a great source of fiber which can help keep you feeling full and satisfied.
However, it’s important to remember that these bars are still a dessert, so enjoy them in moderation! If you’re watching your sugar intake, you can always tweak the sugar measurements to your taste or use a sugar substitute for a healthier version.
What You’ll Need
– 2 cups all-purpose flour
– 1 cup old-fashioned oats
– 3/4 cup granulated sugar
– 1/2 cup brown sugar, packed
– 1 tsp baking powder
– 1/2 tsp salt
– 1 cup unsalted butter, melted
– 1 tsp vanilla extract
– 4 cups fresh or frozen cherries, pitted (about 2 lbs of fresh cherries)
– 1/4 cup granulated sugar (adjust based on cherry sweetness)
– 1 tbsp cornstarch
– 1 tbsp lemon juice
– 1/2 tsp almond extract (optional, for enhanced flavor)
– Extra granulated sugar (for sprinkling on top)
– Fresh cherries for decoration (optional)
These ingredients will make about 12 delicious bars – perfect for sharing (or not)!
How to Make Juicy Homemade Cherry Crumb Bars?
1. Preheat your oven to 350°F (175°C). Grease a 9×13 inch baking dish or line it with parchment paper for easy removal.
2. In a large mixing bowl, combine the flour, oats, granulated sugar, brown sugar, baking powder, and salt. Mix well until combined.
3. Pour in the melted butter and vanilla extract, then stir until the mixture is crumbly but holds together when pressed.
4. Reserve about 1 cup of the crumb mixture for the topping, and press the remaining mixture into the bottom of the prepared baking dish to form the crust.
5. In another bowl, prepare the cherry filling by mixing the pitted cherries with the sugar, cornstarch, lemon juice, and almond extract (if using). Toss until well combined and set aside for 10 minutes to allow the flavors to meld.
6. Spread the cherry filling evenly over the crust in the baking dish, ensuring every bite will have that deliciousness!
7. Sprinkle the reserved crumb mixture over the cherry filling, covering it evenly. Lightly sprinkle additional granulated sugar on top for that sparkling finish that’s oh-so-tempting!
8. Bake in the preheated oven for about 35-40 minutes, or until the topping is golden brown and the cherry filling is bubbly – mmm!
9. Remove from the oven and let it cool in the pan for at least 30 minutes before cutting into squares. This helps the filling set up better!
10. Serve the bars at room temperature, optionally garnished with fresh cherries for that picture-perfect finish.
Sweet Tips for the Perfect Bars!
– If you want to jazz things up a bit, try adding a teaspoon of cinnamon to the crumb mixture. It adds a lovely warmth!
– These cherry crumb bars are perfect for summer picnics, potlucks, or just a cozy night at home with some ice cream.
– Pack any leftovers in an airtight container to enjoy for up to 3 days at room temperature or up to a week in the fridge – if they last that long!
So, there you have it! I can’t wait for you to try making these Juicy Homemade Cherry Crumb Bars. Trust me, once you get that first bite and taste the juicy cherries combined with that crumbly crust, you’ll be hooked! Don’t forget to shout your success from the rooftops (or my comments section) – I’d love to hear how yours turn out! Happy baking! 🍒


