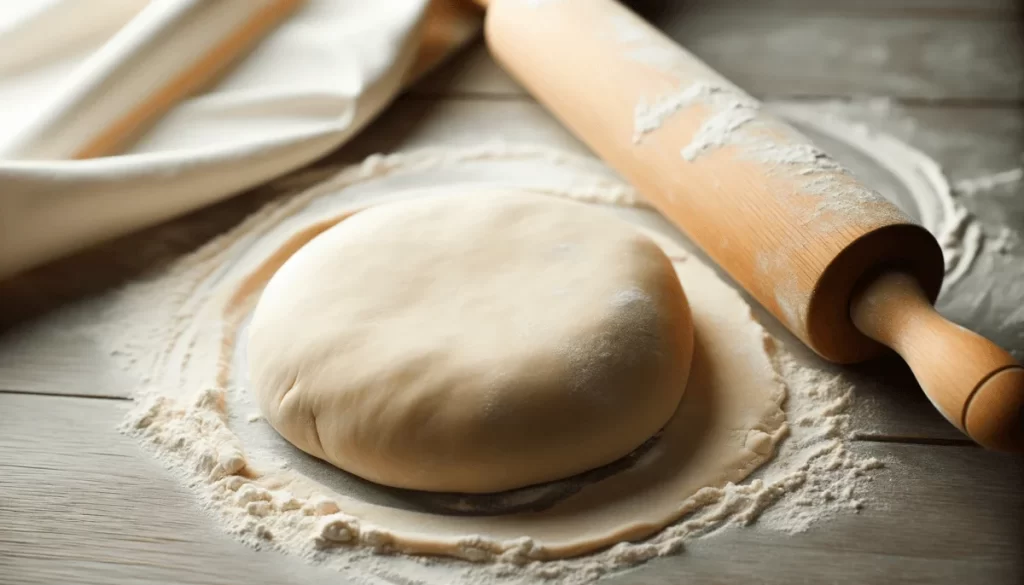
Making homemade pastry dough is fun and easy! I love the light, flaky layers it makes. With a few ingredients and a little time, you can make it too!
One of my favorite ways to use this dough is in a sweet treat called butter tarts. The soft, sweet inside with the flaky crust is so yummy. You can try making them too with this butter tarts recipe.
Let’s get started and make some tasty pastry dough together!
Table of Content
Serving Size and Preparation Time
Serving Size and Yield:
This recipe makes enough homemade pastry dough for 12 small, yummy tarts. If you want to make more, simply double the recipe to make 24 tarts.
How Long Does It Take?
| Activity | Time |
|---|---|
| Prep Time | 15 minutes |
| Chilling Time | 45 minutes |
| Roll & Shape Time | 15 minutes |
| Total Time | 1 hour 15 minutes |
Ingredients for Homemade Pastry Dough:
List of Ingredients:
- 1 1/4 cups (156g) all-purpose flour
- 1/2 cup (113g) unsalted butter, cold and cubed
- 1/4 teaspoon salt
- 3 to 4 tablespoons ice water
Pro Tip for the Best Pastry Dough:
- Ensure the butter is very cold to achieve a flaky pastry. You can even place the cubed butter in the freezer for about 15 minutes before using it to ensure it stays solid during the initial mixing.
- The water should be ice-cold to prevent the butter from melting during the mixing process. This helps to keep the dough flaky when baking.
Essential Kitchen Tools for Homemade Pastry Dough:
Making yummy pastry dough is easy with a few tools! Let’s keep things simple and fun. Here’s what you’ll need:
- A big bowl
- Cups and spoons for measuring
- A rolling pin
- Plastic wrap
- A flat surface for rolling
With these basic kitchen tools, you’ll be set to make the best pastry dough! Let’s get started on the next step together.
How to Make Pastry Dough At Home:
Time needed: 1 hour and 15 minutes
- Combine Dry Ingredients
In a large bowl, gently whisk together 1 1/4 cups of all-purpose flour and 1/4 teaspoon of salt, ensuring they are well mixed without any lumps.
- Add the Butter
Add 1/2 cup of cold, cubed butter to the flour mixture. Using your fingertips, gently rub the butter into the flour until the mixture resembles coarse breadcrumbs. Be sure not to overwork it to keep the pastry flaky.
- Add Water and Form Dough
Gradually sprinkle 3 tablespoons of ice water over the mixture. Use a fork to gently stir until the dough begins to clump together. If needed, add an additional tablespoon of water. Gently gather the dough and press it into a ball.
- Shape and Chill the Dough
Flatten the dough ball slightly to form a disc shape. Wrap it securely in plastic wrap and place it in the refrigerator. Allow it to chill and rest for at least 45 minutes. This resting step is crucial to relax the gluten and ensure a tender pastry.
- Roll Out the Dough
Unwrap the chilled dough and place it on a lightly floured flat surface. Using a rolling pin, gently roll the dough out, ensuring it’s evenly spread to your desired thickness. If the edges crack a bit, simply press them back together.
- Shape and Use
Carefully lift and place the rolled dough into your pie tin or tart molds, gently pressing it into the corners without stretching it. Trim any excess dough and shape the edges as desired. Your pastry is now ready to be filled or pre-baked according to your recipe!
Swapping Ingredients for Dietary Needs and Preferences
Gluten-Free Pastry Dough:
Replace the all-purpose flour with a gluten-free flour blend. Bob’s Red Mill offers a great option that can be used in a 1:1 ratio. Note that gluten-free dough might be a bit more fragile; handle with care!
Dairy-Free/Vegan:
Substitute the unsalted butter with a vegan butter alternative or coconut oil. If using coconut oil, use 3/4 cup to replace 1/2 cup of butter to maintain the rich, buttery flavor without making the dough too oily. Earth Balance is a widely available vegan butter that works well in baking.
Low-Sodium:
If you’re watching your sodium intake, consider using unsalted butter (which we’re already using in the original recipe) and a pinch of salt, or omit the salt entirely if needed.
Sugar-Free:
While this recipe doesn’t contain sugar, if you’re making a sweet pastry, consider using a granulated sugar substitute like Swerve or Stevia. Follow the package instructions for quantity adjustments.
Note:
- When using gluten-free flour, the dough may be a bit stickier. Consider chilling it for a bit longer and rolling it out between two sheets of parchment paper to prevent sticking.
- Vegan butter tends to be a bit saltier than dairy butter, so you might want to reduce the added salt in your recipe slightly.
Solutions to Common Pastry Making Problems:
Ensure that the dough has enough moisture. Gradually add more chilled water, mixing gently, until the dough just comes together. It should form a cohesive ball when pressed but not be overly sticky.
Avoid overworking the dough and ensure all ingredients, especially the butter, are cold. Minimal handling prevents the development of too much gluten, which can make the pastry tough.
Allow the formed pastry to rest and chill in the fridge for at least 30 minutes before baking. This relaxes the gluten and helps maintain the shape during baking.
For pies with a wet filling, consider blind baking the crust for 10-15 minutes before adding the filling. This creates a barrier and helps to avoid a soggy bottom.
Before baking, prick the bottom of your pastry with a fork (called “docking”) to allow steam to escape and prevent puffing. Alternatively, use pie weights during blind baking.
Yes, wrap the dough tightly in plastic wrap and place it in a freezer bag. It can be frozen for up to 3 months. Thaw it in the fridge overnight before using.
Other Delicious Recipes You May Also Enjoy!!
- Butter Tarts Recipe: A Canadian Classic
- Pear Galette: Simple, Perfect Dessert
- Strawberry Cream Cheese Danish
- Pumpkin Pie Bars Recipe
Have you liked our recipe? We’d love to hear from you! Drop a comment below, share your tweaks, and let’s spread the baking joy together. Your tips might just be the secret ingredient someone needs!


