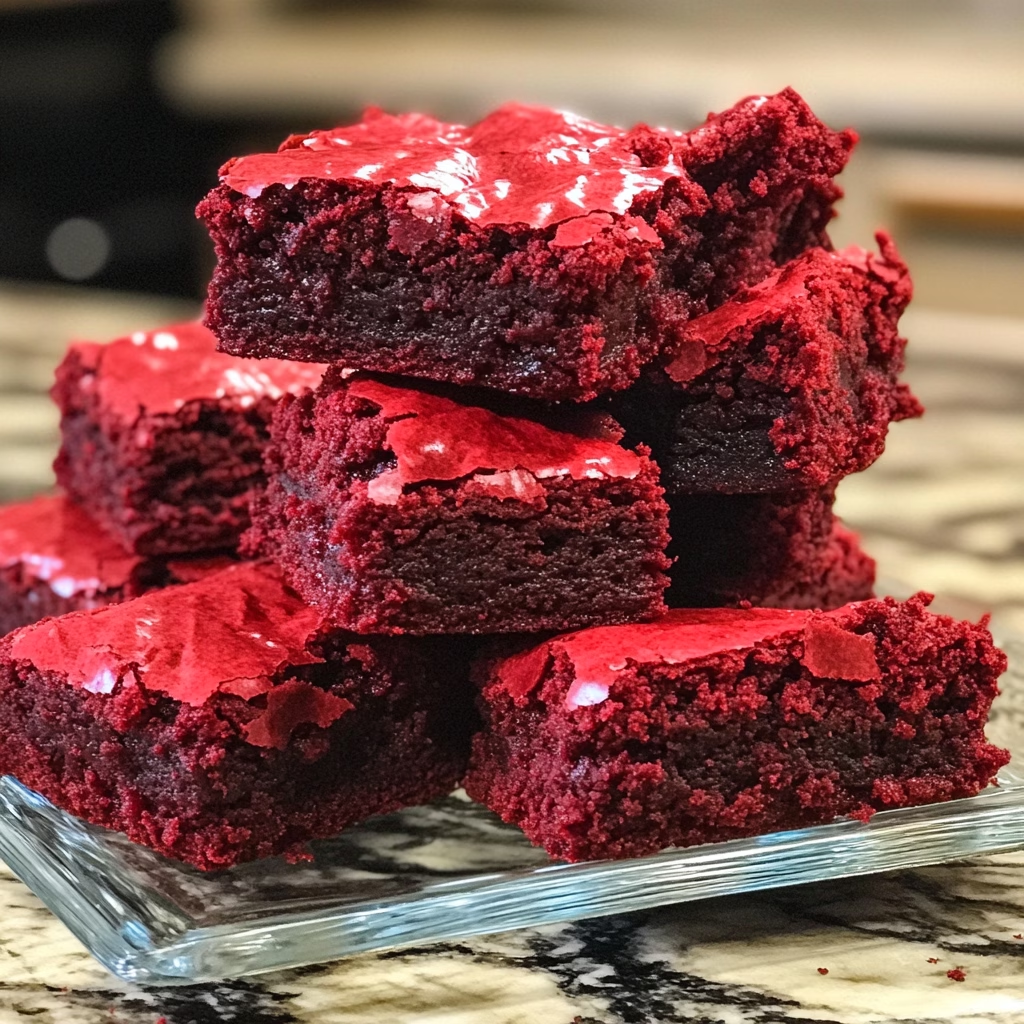
Oh, friends, gather ’round because today I’m about to share with you a recipe that’s as delicious as it is stunning: Red Velvet Brownies! These beauties are not just a feast for your taste buds but also a real eye-catcher with their vibrant red color. I remember the first time I made them – it was for a Valentine’s Day gathering with friends. As soon as they hit the table, countless “Oohs” and “Aahs” filled the air, and let me tell you, they vanished quicker than the last slice of pizza at a party!
What I love about these brownies is that they’re like the love child between a classic brownie and that decadent red velvet cake we all adore. Fudgy, rich, and oh-so-sweet, they carry the traditional flavors of red velvet but with a chocolaty twist. Plus, they’re super easy to whip up, making them an absolute must-have for any gathering. Let’s dive into the magic of baking these scrumptious brownies!
What’s in Red Velvet Brownies?
Unsalted Butter: This is the base of our brownies. I always use unsalted butter because it gives me control over the saltiness of the final product. Melted butter means we will achieve that rich, chewy texture that we all crave.
Granulated Sugar: A significant player here! The sugar not only sweetens but also helps in creating that soft, fudgy center. Trust me; it’s hard to resist!
Eggs: These guys are our binding agents. They add moisture and help create that gooey brownie consistency we all love. Use large eggs for best results!
Vanilla Extract: A staple in any baking recipe! It brings warmth and enhances the flavors of the chocolate and red velvet.
Red Food Coloring: The star of the show! It gives these brownies that signature vibrant hue. You can use gel or liquid food coloring, but I lean toward gel for a more intense color.
All-purpose Flour: This helps provide structure to our brownies. Make sure to sift for a lighter texture!
Unsweetened Cocoa Powder: The cocoa adds that delicious chocolate flavor – because who doesn’t want an extra chocolate kick?
Baking Powder: We’ll use just a smidgen of this leavening agent to give our brownies that perfect rise.
Salt: Just a pinch, but it’s essential! It balances the sweetness and elevates all the flavors.
White Chocolate Chips (optional): If you’re feeling extra adventurous, fold these in for a pop of sweetness and a little texture.
Is Red Velvet Brownies Good for You?
Now, let’s have a quick heart-to-heart about whether these sweet treats are good for you. While they are indulgent and packed with flavor, you could say they won’t win any health awards. But hey, it’s all about balance, right? Here’s the lowdown:
Butter: While it makes things delicious, it’s definitely on the calorie-heavy side. But life is short – why not savor it?
Sugar: Yep, there’s a good amount of sugar here, which contributes to that sweet delight. Enjoy in moderation!
Cocoa Powder: On the plus side, cocoa is rich in antioxidants. So, if you want to convince yourself you’re being a bit healthy, feel free to bring that up with your friends!
White Chocolate Chips: If you choose to add these, remember they add sweetness and calories. But can you ever have too much chocolate? I think not!
Ingredients for Red Velvet Brownies
You’ll need the following ingredients to whip up approximately 12 glorious brownies:
– 1 cup (2 sticks) unsalted butter, melted
– 2 cups granulated sugar
– 4 large eggs
– 1 teaspoon vanilla extract
– 1 tablespoon red food coloring
– 2 cups all-purpose flour
– 1/2 cup unsweetened cocoa powder
– 1 teaspoon baking powder
– 1/2 teaspoon salt
– 1 cup white chocolate chips (optional)
How to Make Red Velvet Brownies?
Let’s roll up those sleeves and get to the good stuff!
1. Preheat your oven to 350°F (175°C). Grab a 9×13 inch baking pan and grease it up, then line it with some parchment paper – this makes for easy brownie removal later!
2. In a large mixing bowl, combine the melted butter and your granulated sugar. Whisk until they’re besties (a nice glossy mix).
3. Now, let’s add in the eggs, one at a time, mixing well after each addition. Stir in that lovely vanilla extract and red food coloring until everything is beautifully combined!
4. In another bowl, sift together the flour, cocoa powder, baking powder, and salt. It’s like giving the dry ingredients a spa day!
5. Gradually add those dry ingredients to the wet mixture, mixing until just combined. We don’t want to overmix; nobody wants tough brownies! Think thick, fudgy goodness.
6. If you’re feeling fancy, fold in the white chocolate chips for that extra zing of sweetness and texture.
7. Carefully pour your luscious batter into the prepared baking pan and spread it evenly. No batter left behind!
8. Bake these beauties for 25-30 minutes. You’ll know they’re done when a toothpick inserted in the center comes out with a few moist crumbs.
9. Let those brownies cool completely in the pan before you lift them out using the parchment paper. Then, slice them into squares!
Baking Joy: Tips and Twists
Now, I wouldn’t want to leave you without some extra pearls of wisdom!
– You could switch it up and use dark chocolate chips instead of white for a richer flavor.
– Want to make it a little more festive? Add some sprinkles on top before baking or serve with a dollop of whipped cream!
– These brownies can also be frozen, so if you end up with leftovers (but really, who could resist?), wrap them up tight and enjoy them later on.
So, that’s my go-to recipe for Red Velvet Brownies! They’re perfect for celebrations or just because it’s Tuesday. I hope you give them a try – I promise you’ll fall in love. And when you do, share your experience with me! Happy baking, my sweet-toothed friends!


